
Server Notifications
App Store
Providing App Store Server Notifications URL is important. It helps to detect cancellations, refunds and other events in real-time.
Generate In-App Purchase Key
Follow App Store Credentials (In-App Purchase Key) guide on how to generate In-App Purchase key.
App Store Server Notifications V1 vs V2
Apphud supports both v1 and v2 versions of the Server Notifications.
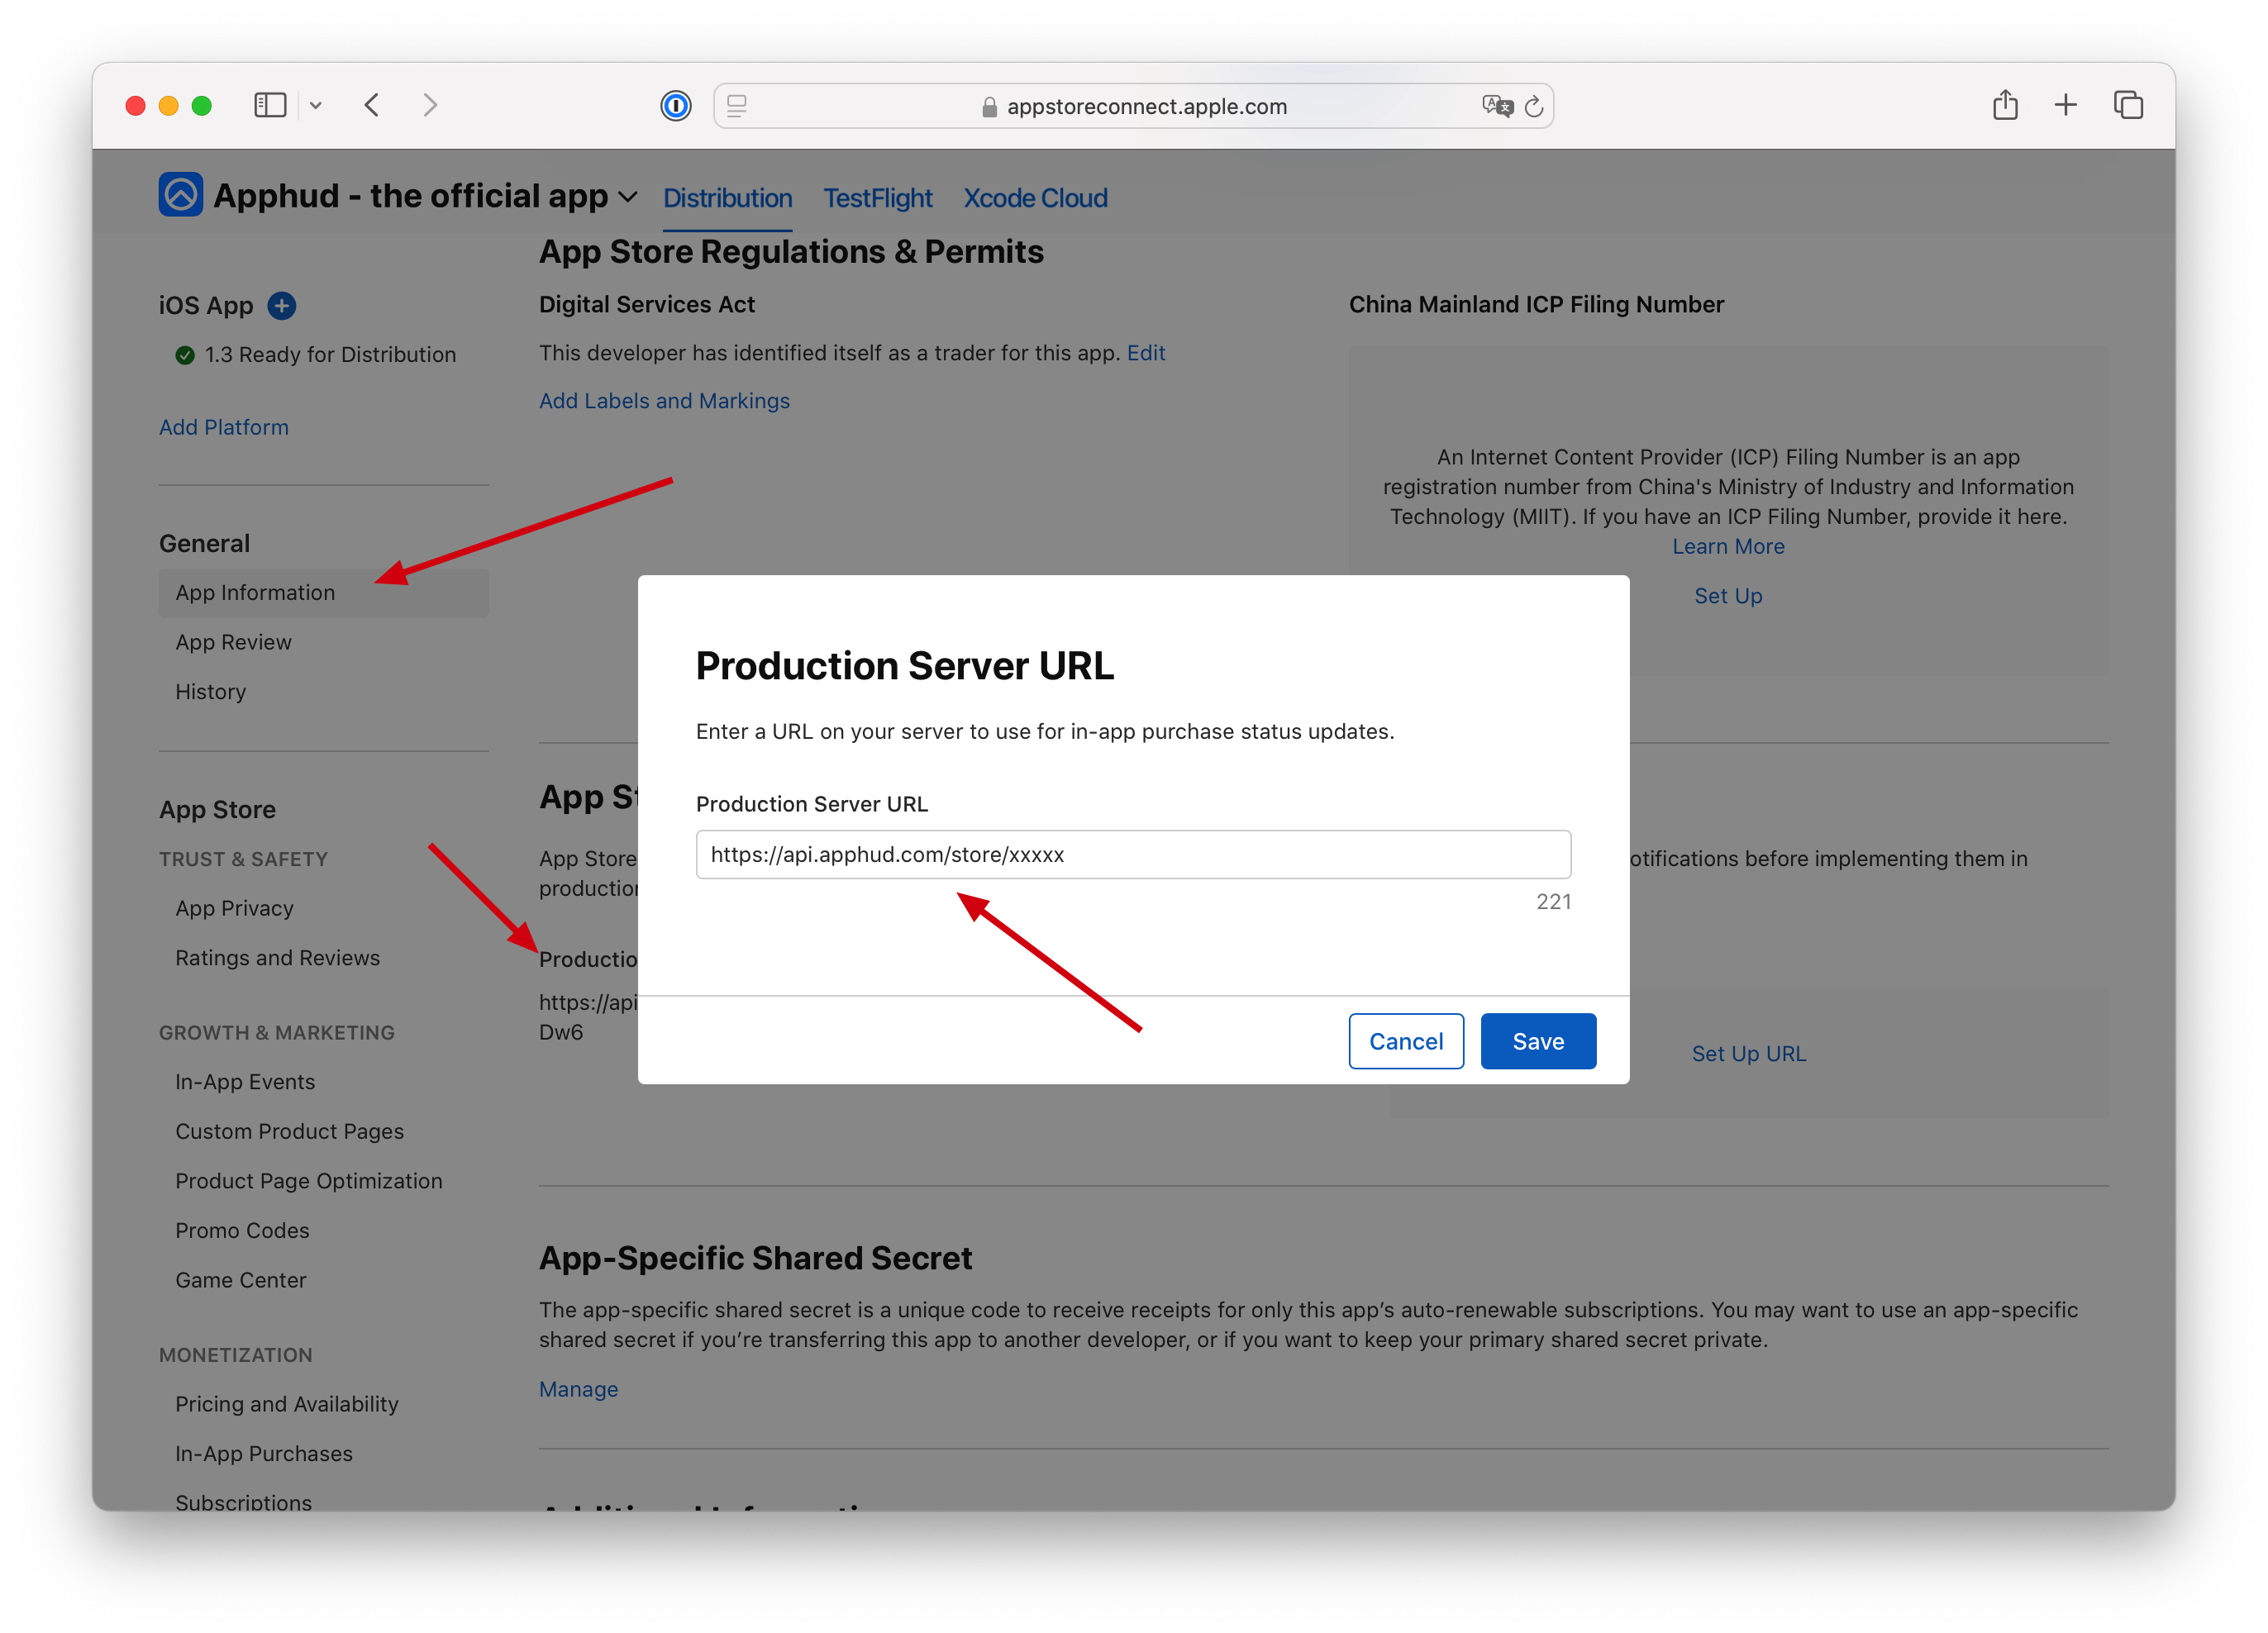
Set up App Store Server Notifications
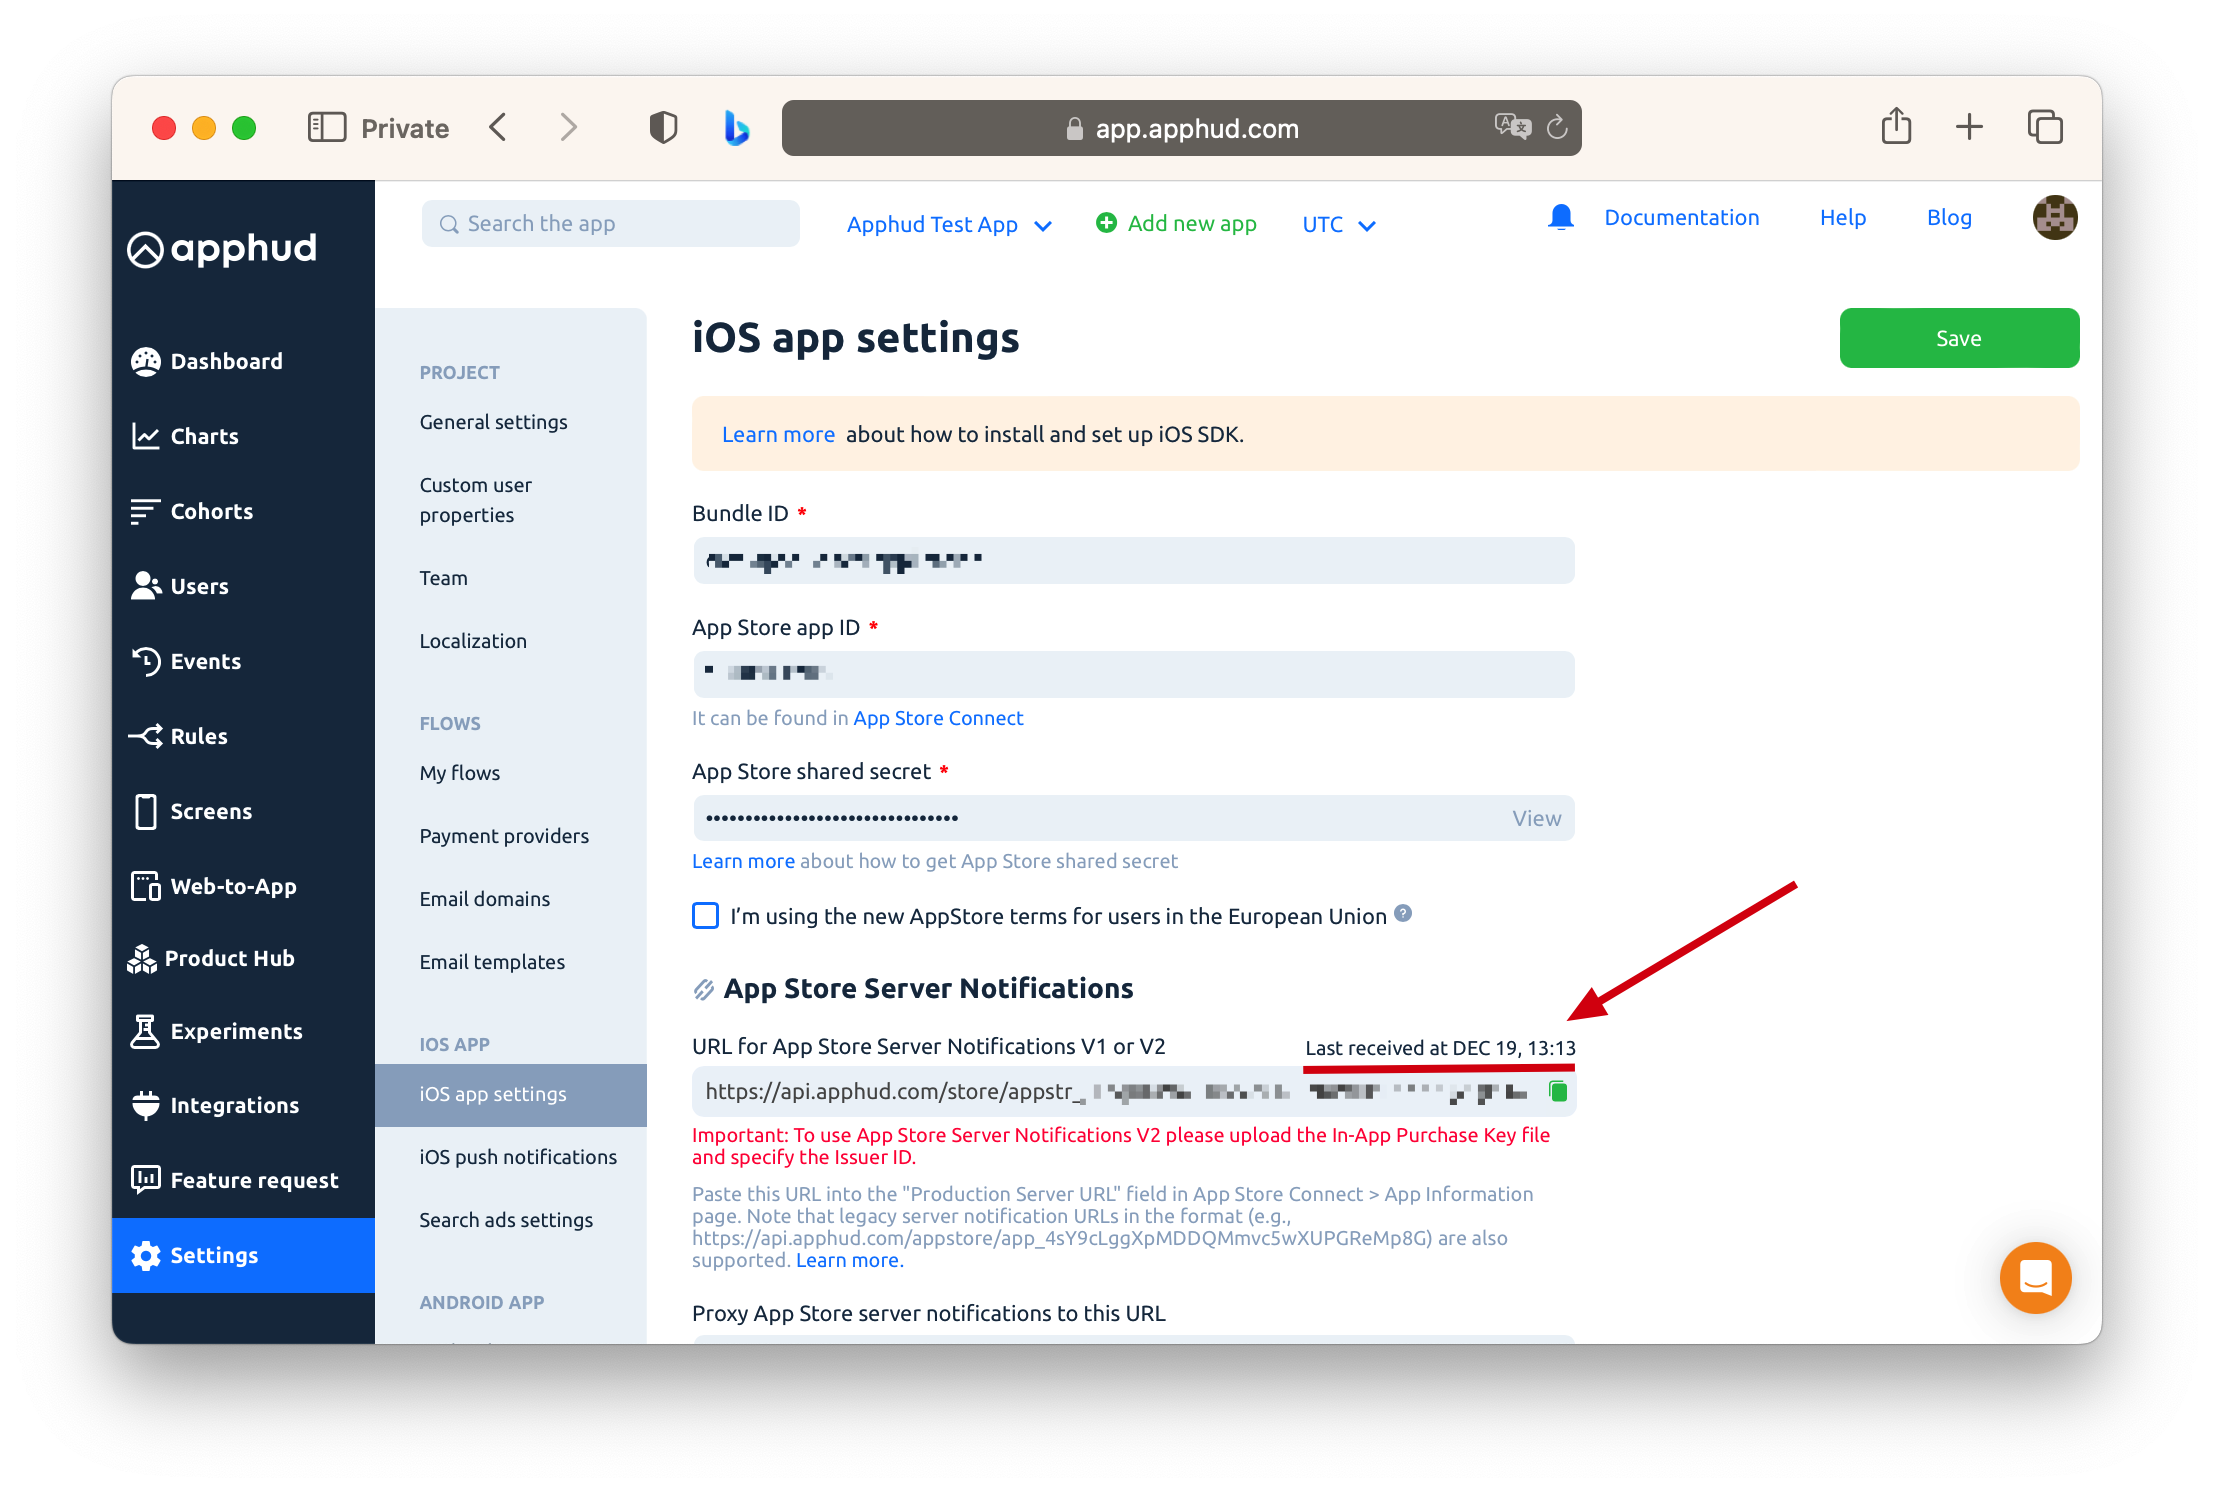
- Copy your URL for App Store Server Notifications from Apphud. It can be found when adding new app in a wizard or in Apphud > Settings > iOS app settings.
- Open App Store Connect, go to “My Apps” and choose your app.
- Under "App Information**"** find "App Store Server Notifications", paste generated URL under Production Server URL and paste the same URL for Sandbox Server URL.
- Follow App Store Credentials (In-App Purchase Key) guide on how to generate In-App Purchase key.
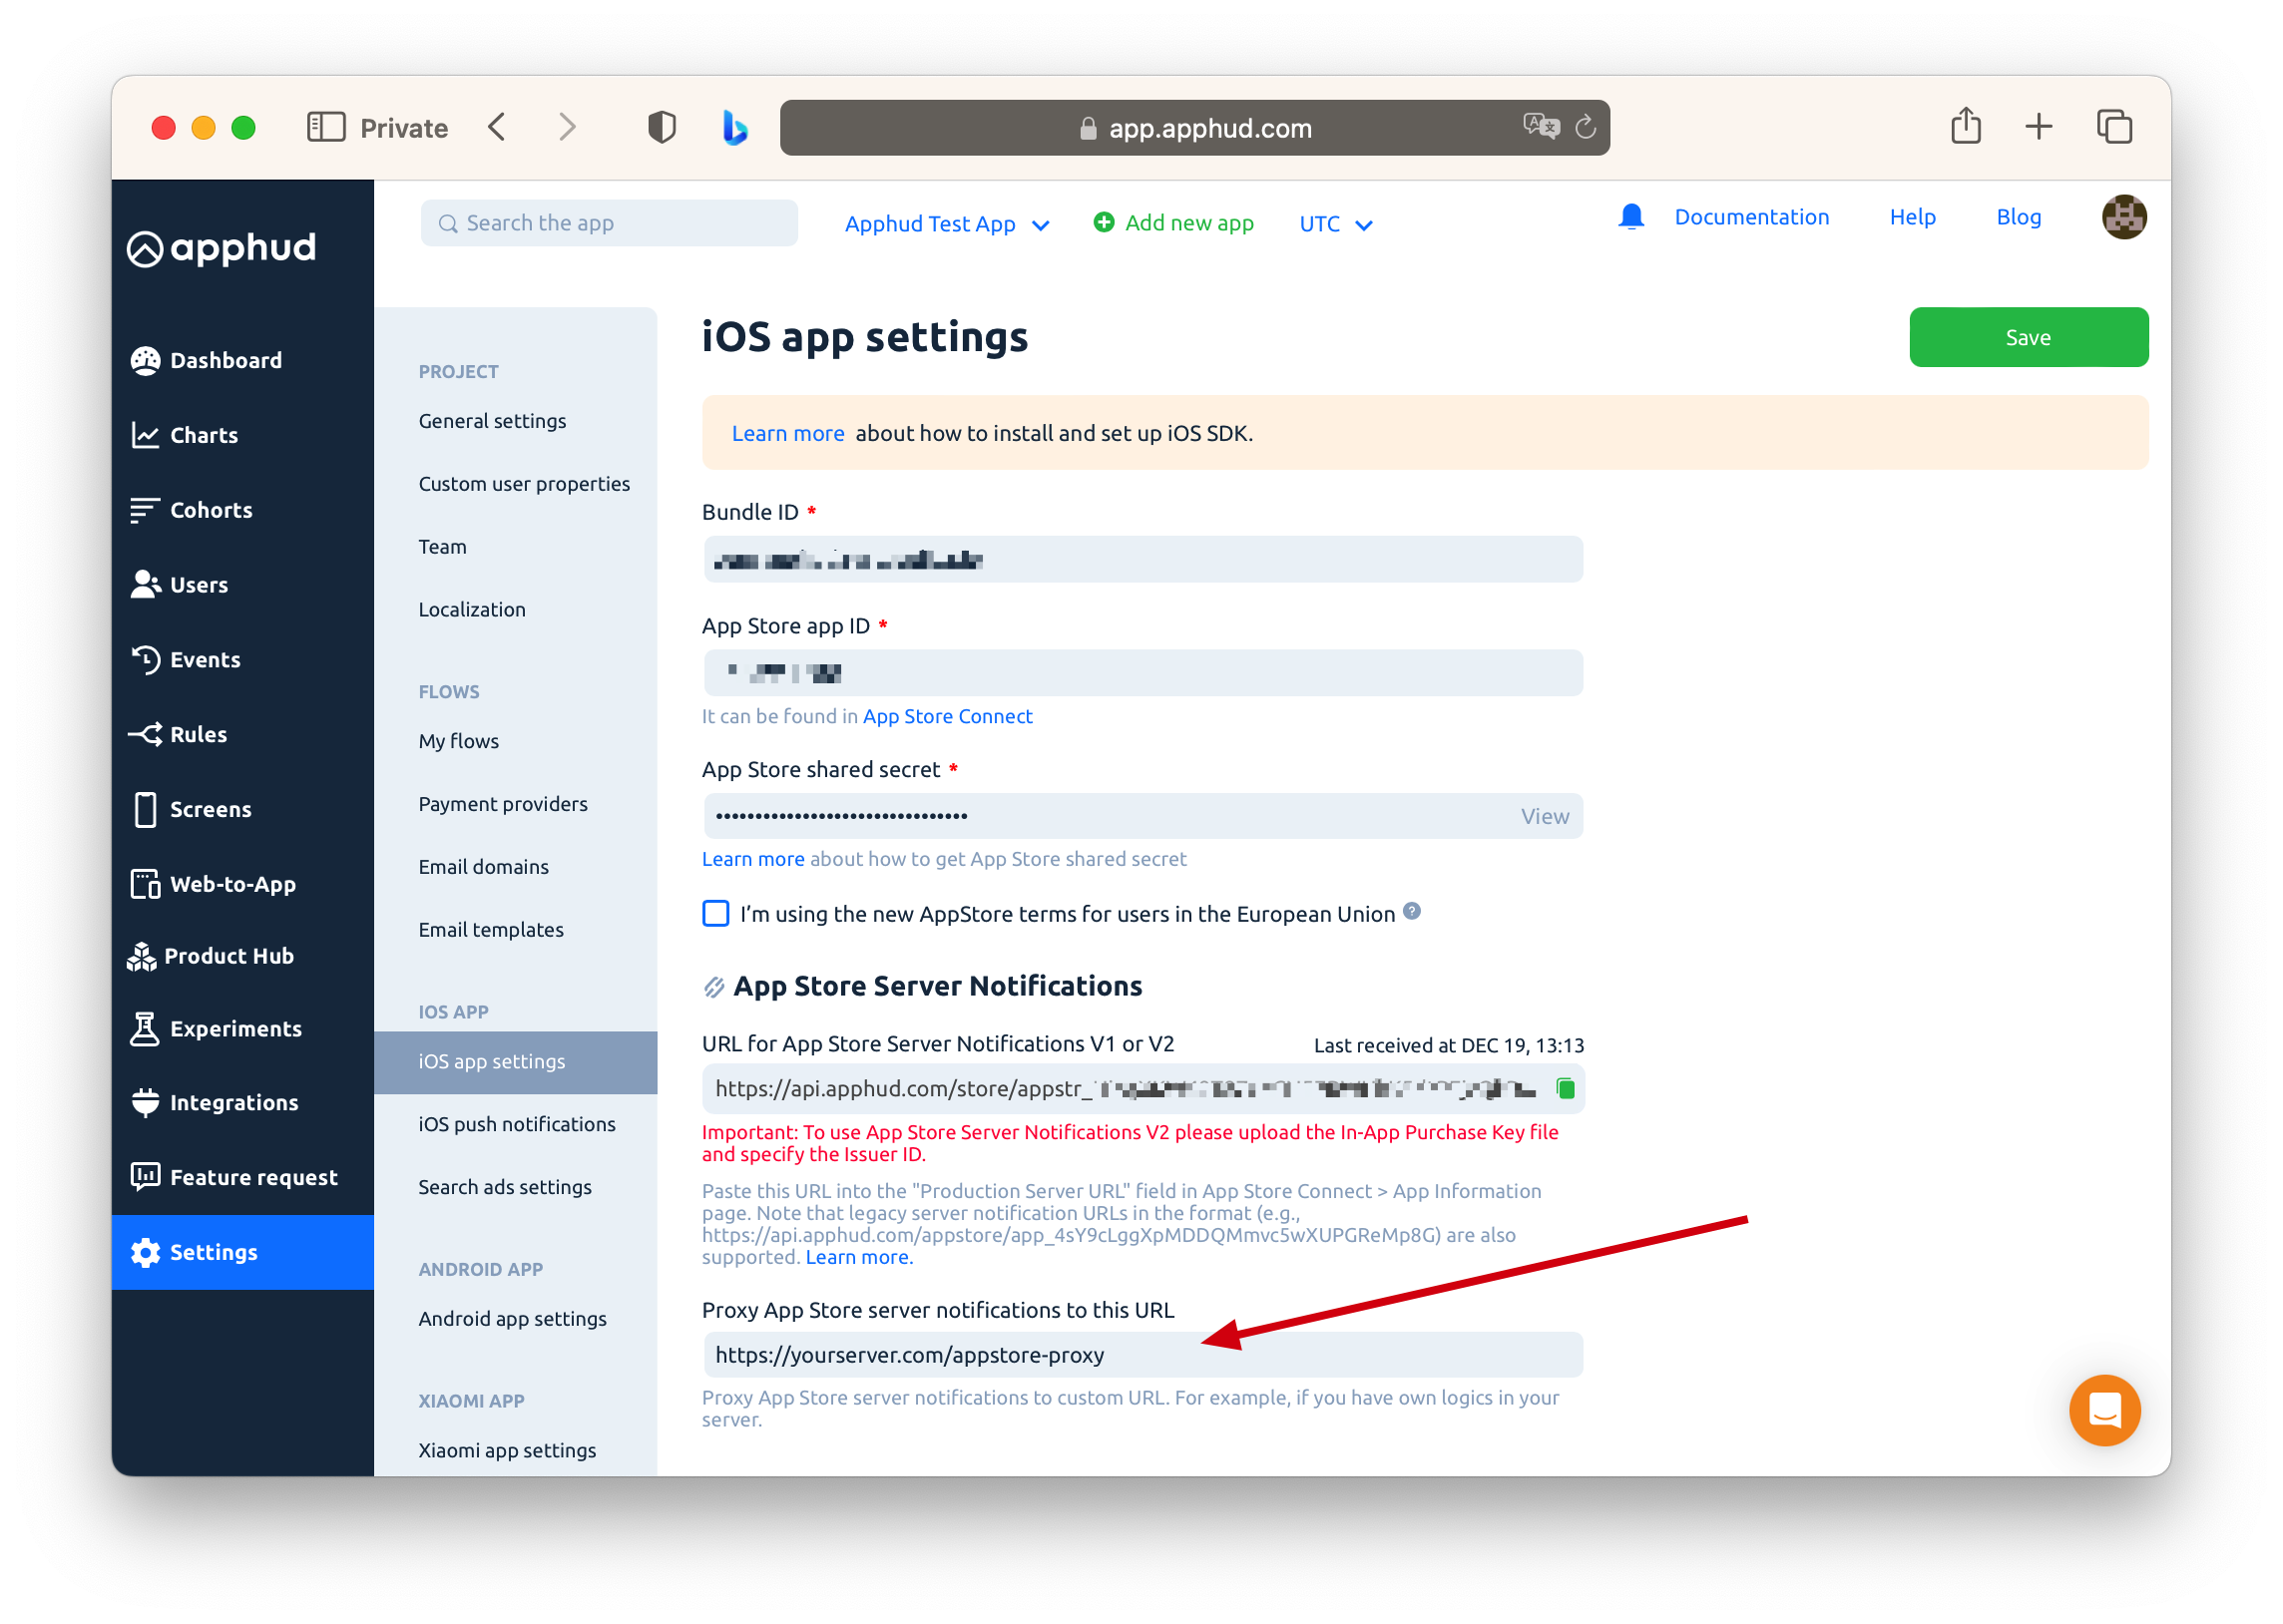
Forward App Server Notifications to your own Server
Already using App Store Notifications? Not a problem, take a look at our App Store Server Notifications Proxy feature. Apphud can forward server notifications from to your server.
Deprecation of App Store Server Notifications V1
App Store Server Notifications V1 are deprecated and might be removed by Apple at any time. We suggest you set up V2.
NoteIf App Store Server Notifications block is missing in App Store Connect, try to create in-app purchases first.
If everything is set up correctly, you should see Last Received at date in Apphud Settings. You can read more about App Store Notifications here.
App Store Server Notifications Proxy
You can forward all server notification requests from Apphud to your own server by using Proxy feature.
Paste your server's endpoint into "Proxy App Store Server Notifications to this URL" field:
Google Play
Configuring Google Real-time Developer Notifications is important. It helps to detect cancellations, refunds and other events in real-time.
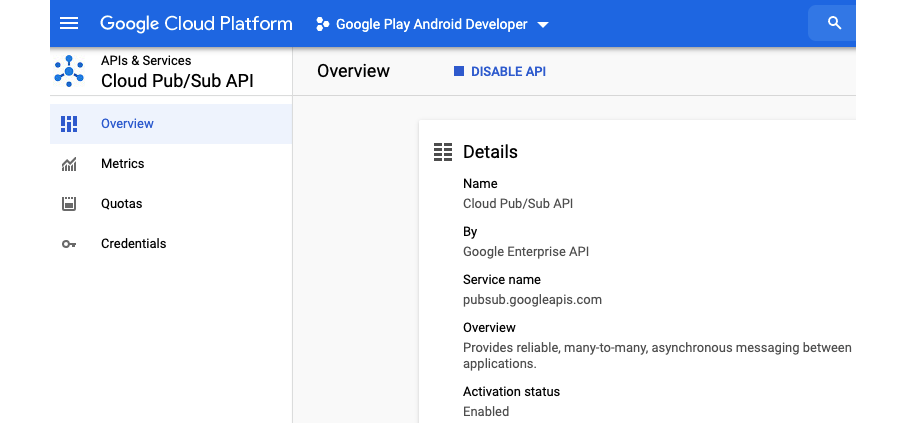
Step 1
Ensure that Cloud Pub/Sub API is enabled for your project. You can check here.
Step 2
Ensure Google Play Service Credentials are correctly set up.

Step 3
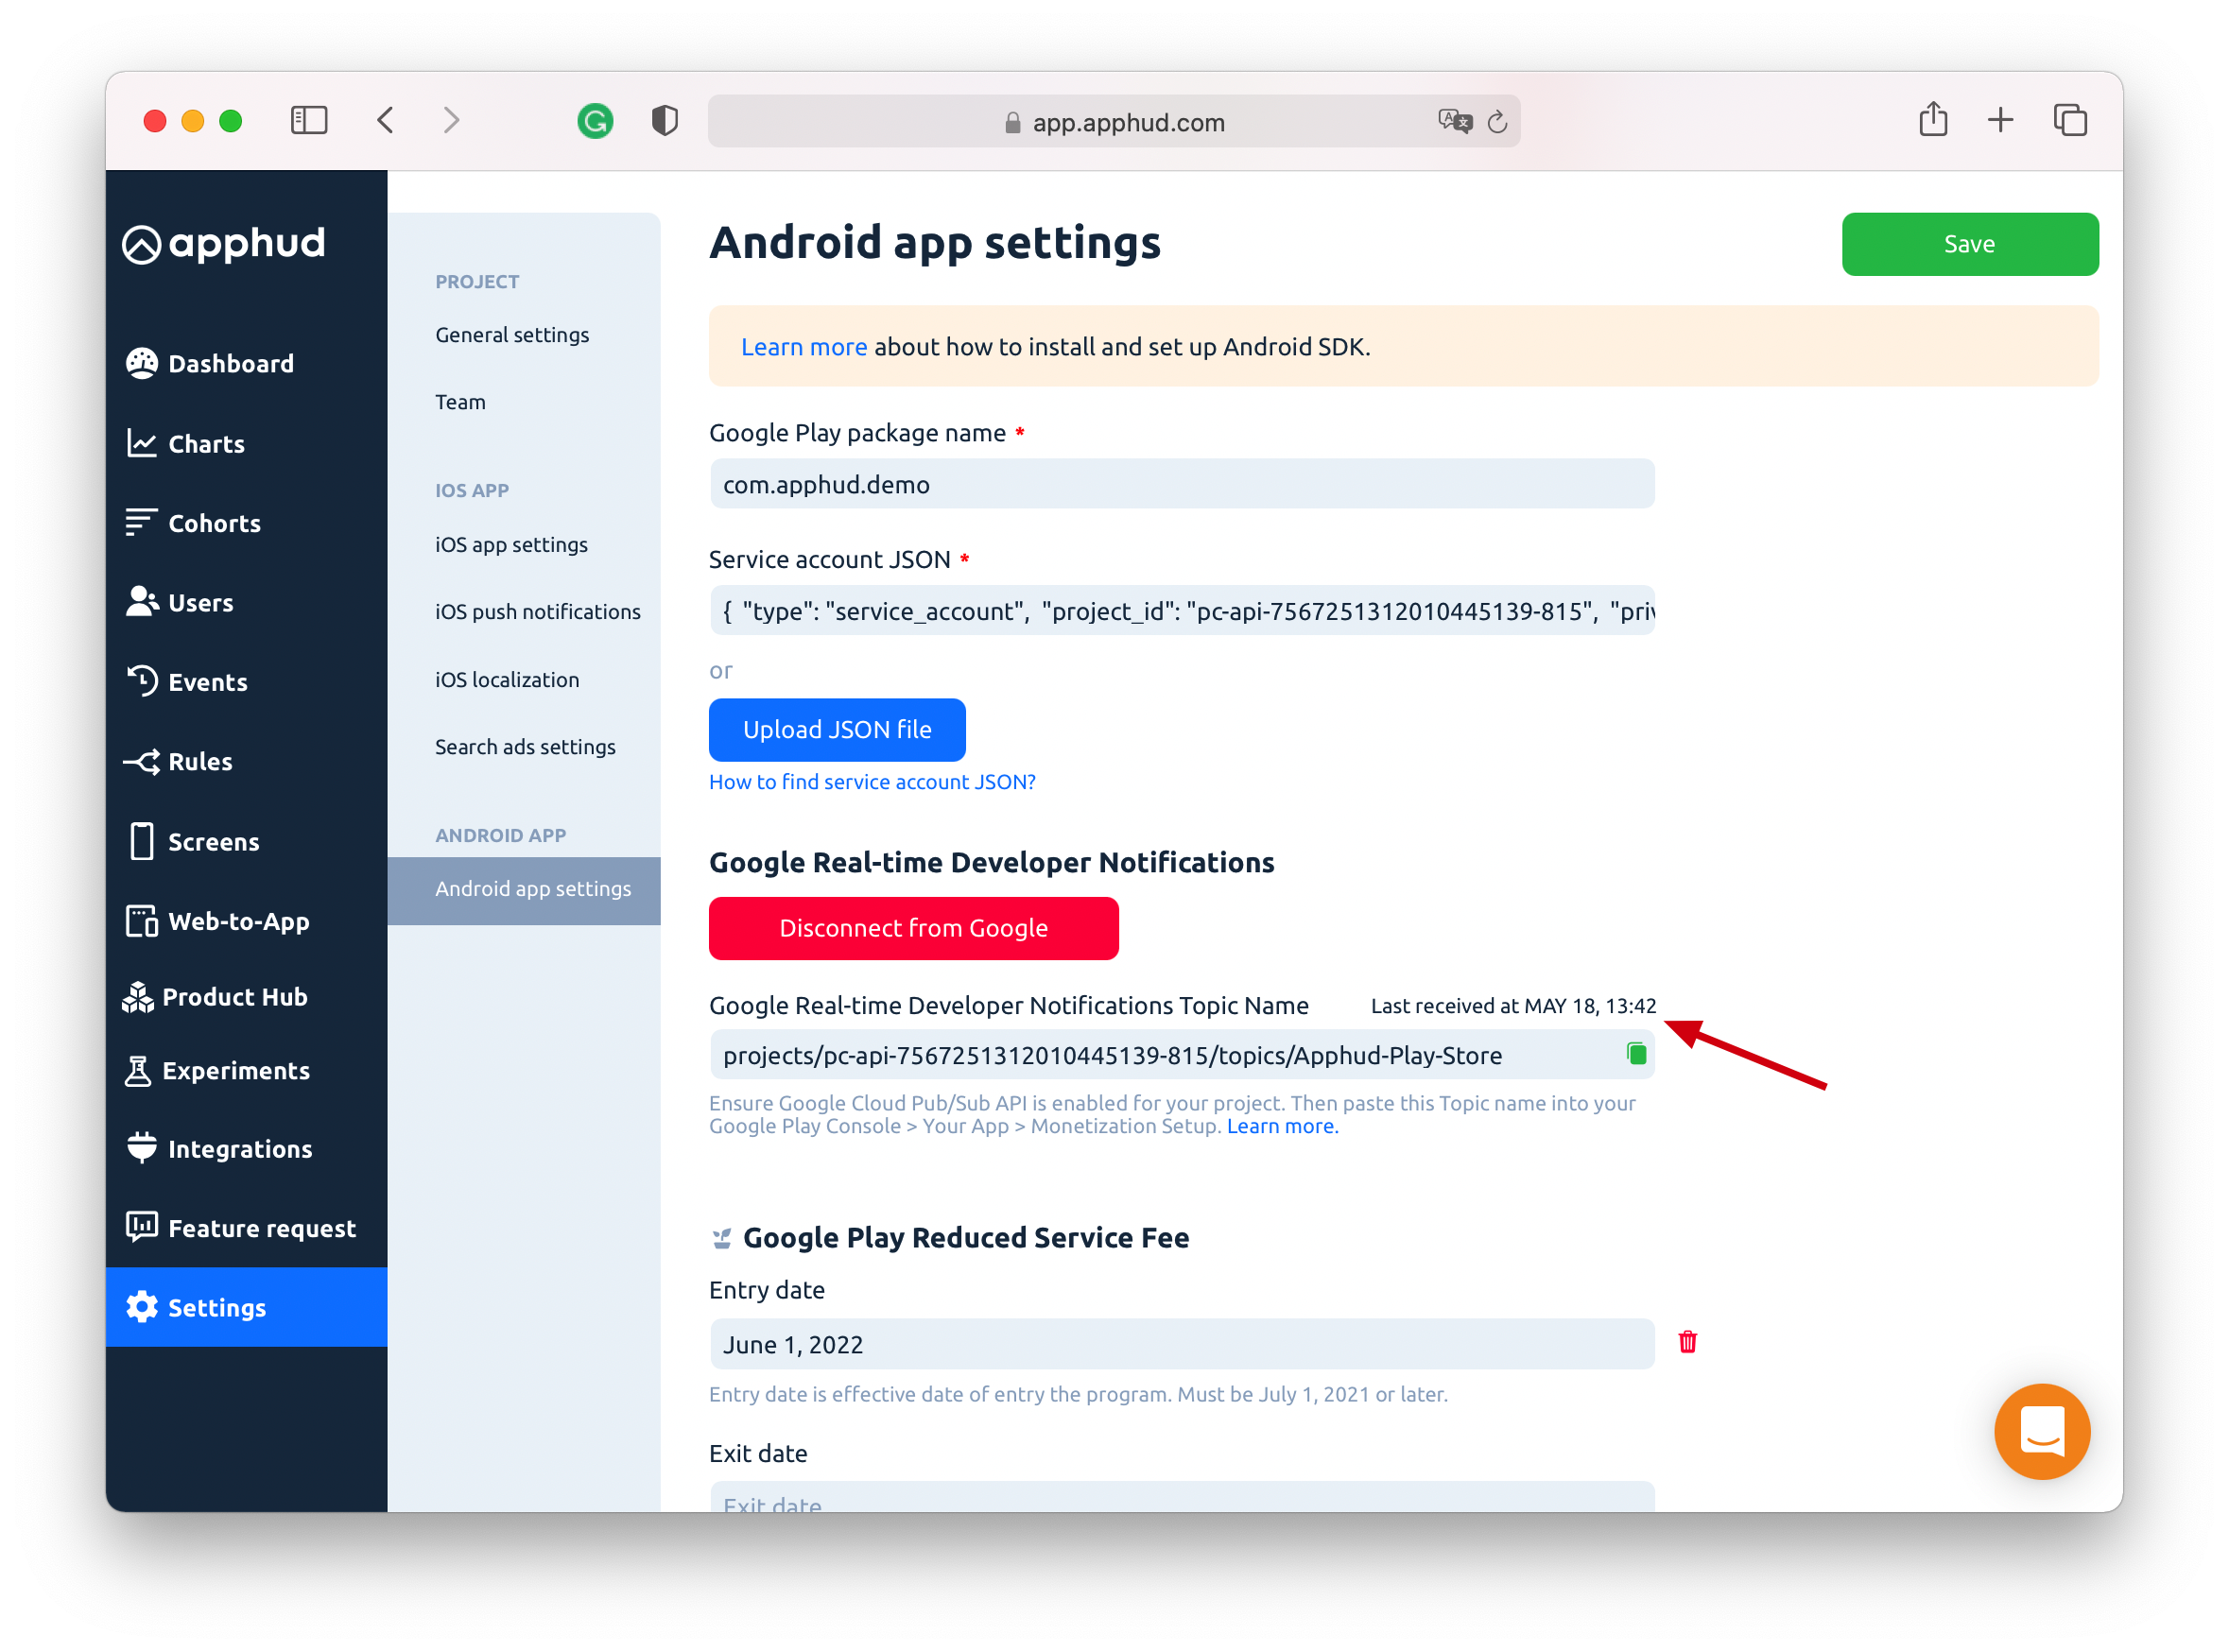
In Apphud Settings > Android app settings page click Connect to Google. After that copy Topic name value show up. Copy entire Topic string.

Step 4
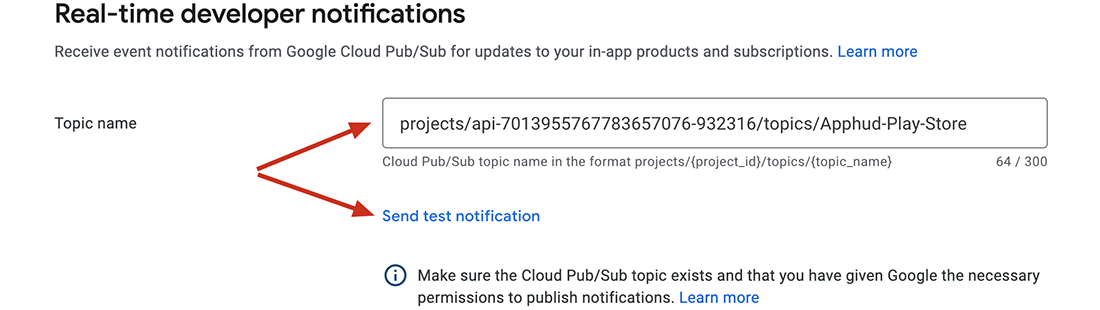
Go to Google Play Console > Your app > Monetization setup and paste Topic into Topic name field. Click Send test Notification.
Step 5
Go back to Apphud settings. If everything set up correctly you should see the Last received at date. All done!
Receive Google Notifications in Apphud and in your Server
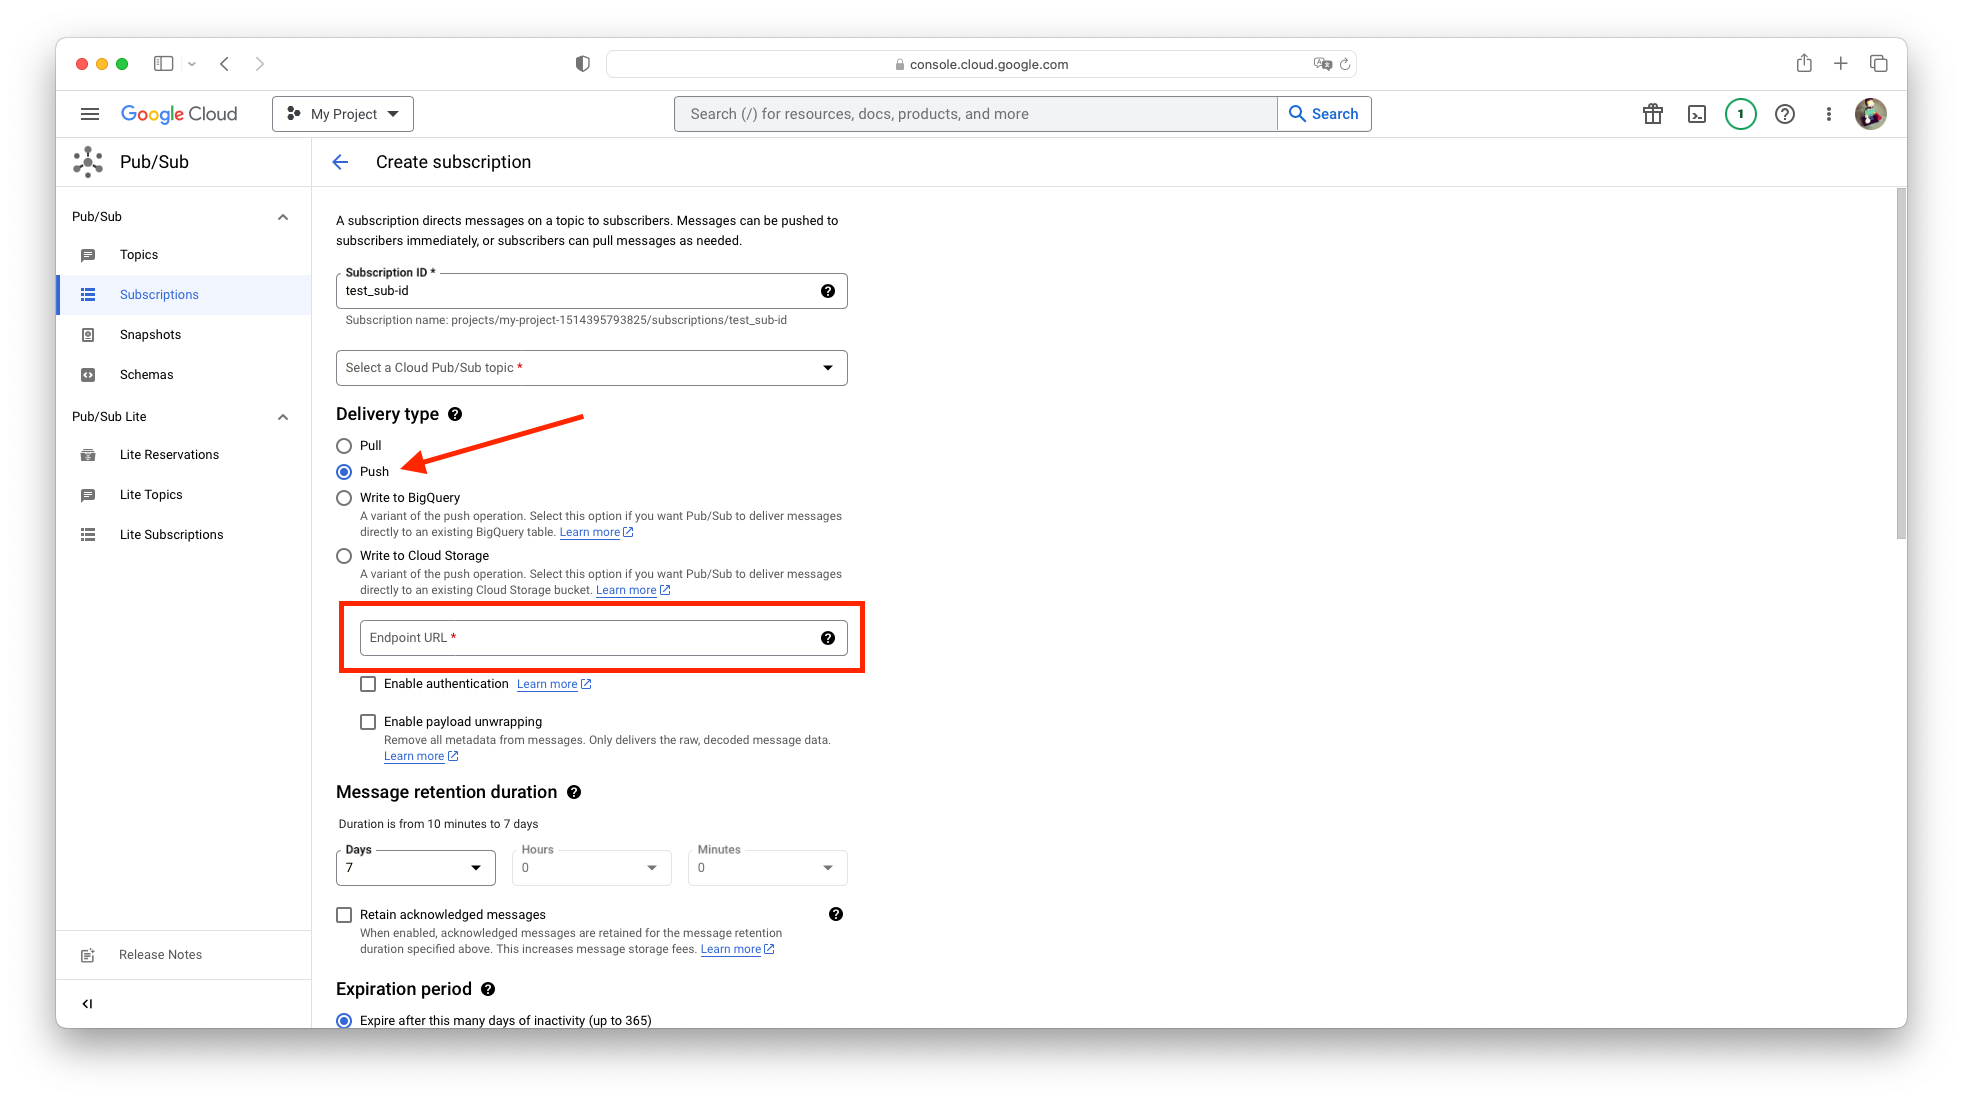
In the Google cloud console, you can create another topic and set up sending webhooks to Apphud and other services.
You need to go to the Google Cloud console section, and then go to Pub/Sub > Subscriptions and create a Subscritipion with the Push type. Create Push and paste the URL of your server where you need to send the subscriprtion notifications.
Updated 6 months ago